Chromecast is a popular casting device that lets you stream media files from the smaller screens of mobile devices to the larger screens of PC or TV. You can cast everything from pictures to videos without any limits. However, you need to change the Wi-Fi network on your Chromecast while changing the router or modem. Changing Wi-Fi Network on Google Chromecast does not require rocket science. You can change it with the help of the Google Home app.
How to Change Wi-Fi Network on Chromecast using Google Home?
Switching your Chromecast to a new Wi-Fi network is very easy as long as the existing network is active.
Step1: Connect your Google Chromecast to the TV.
Step2: Install and open the Google Home app on your Android or iOS device.
NOTE: Your iOS/Android device must be on the same Wi-Fi network.
Step3: Select your Chromecast device.
Step4: Click the Settings icon located at the top right corner of the screen.
Step5: Scroll down to select the Wi-Fi menu.

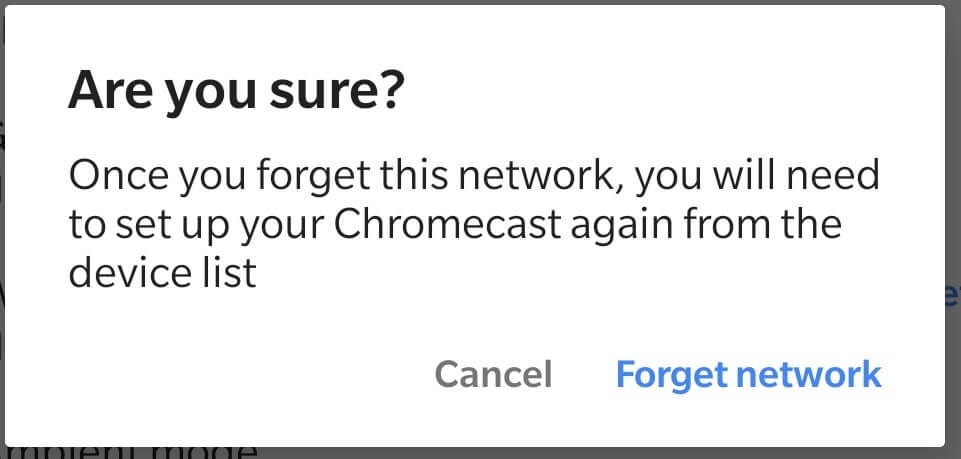
Step6: Select Forget Network on the popup displayed on the screen.

Step7: You will be directed to the home screen.
How to Connect a New Wi-Fi Network to Chromecast Manually
You can change the Wi-Fi network on Google Chromecast Ultra by manually resetting the device. Here are the steps to manually reset your Chromecast device.
Step1: Press and hold the reset button until the LED light flashes in white on your Chromecast device.
Step2: Disccon the HDMI cable and reconnect the cable after a few minutes.
Step3: Now, your Chromecast device will return to the factory settings.
How to Set Up Wi-Fi with your Chromecast
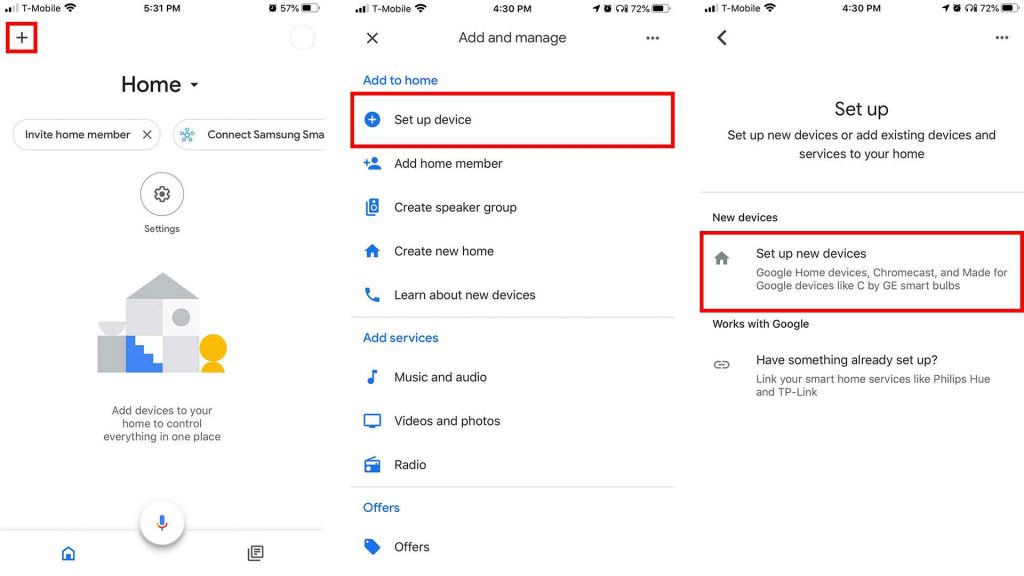
Step1: On the Home screen of the Google Home app, click on the +icon in the top left corner.
Step2: On the next page, select Set up device.
Step3: Under New devices, pick set up new devices.

Step4: Select your profile name and tap Next.
Step5: Google home will search and display the Chromecast device on your screen.
Step6: Tap Yes. You will receive a PIN on both devices.
Step7: Tap Yes if it matches.

Step8: Tap Yes, I’m in on the next screen.
Step9: Select the new Wi-Fi network and tap Next.
Step10: Google Chromecast will get the Wi-Fi password automatically from your phone or tablet.
Tap Enter manually if you want to type the password manually.

Step11: Enter the Wi-Fi password and tap Connect.

Step12: That’s it. You have successfully changed the Wi-Fi network on your Chromecast. Start casting your media file to the TV without any fuss.
Why is my Chromecast not Connecting to New Wi-Fi?
If your Chromecast device is not connecting to Wi-Fi Network, here are some of the fixes.
- Make sure that your device is plugged in properly and power on your device.
- Check whether your device has an adequate power supply.
- Reboot your Chromecast device and the router.
- Update the latest version of the Google Home app.
- Increase the Wi-Fi signal for easy connection.
- Update the Chromecast Firmware.
- Reset your Modem and router.
- Reset your Chromecast device.
These are the steps required to change the Wi-Fi network on Google Chromecast devices. You can also change the Wi-Fi network by resetting the Chromecast to its factory default settings. But, you need to go through the setup process from the first step.
FAQ
Yes, you will require an internet connection to the Chromecast app from smartphone/ PC to TV.
You can change Chromecast’s name using the Google Home app.
You can set up your Chromecast device using a wired internet connection.
To change your Wi-Fi password on Google Home, open Google Home > Wi-Fi > Edit > Change password > Tap Save.
If your Chromecast keeps disconnecting, make sure that you have connected your Chromecast device with the proper internet connection and try again.


Leave a Reply